OK! Here's the tutorial I promised last week on assembling the
Christmas Tree Pyramid cards. You'll need to start by cutting out the pyramid panel, and scoring from the point to the opposite angles, as shown:

Next, you'll cut out the decoupage pieces - each piece is numbered so you can keep them in order as you cut them out. I find it easiest to cut with a craft knife.

Here are all the cut out pieces, ready to shape and assemble on the card.

Take each piece, turn it over, and add some dimension by laying it on a foam pad and pressing into it - I used the wooden end of my embossing stylus, but you could use a rounded pen cap, or anything else with a similar shape.

Turn the pieces face up and press into the top of each piece - this will make the bottom rise a little, and also flatten out the top so it's easier to glue to the card.

The tree on the pyramid has some red lines across it - these are the guidelines for attaching the cut out pieces. Beginning at the bottom, line up the pieces one at a time to create the tree.

Here's the card with all the pieces attached.

Working one section at a time, add
Polar White Flower Soft to the tree... I used a little glitter as well.

Here's my snowy tree....
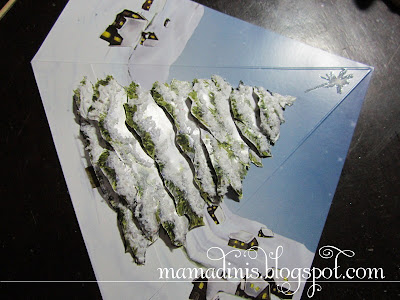
...and my completed card!

Thanks for stopping by!
Dina







 Those are the steps I used!